
 USD
USD  USD
USD  GBP
GBP  EUR
EUR  INR
INR  ZAR
ZAR  AUD
AUD  CAD
CAD  MYR
MYR  SGD
SGD  THB
THB  HKD
HKD  BRL
BRL  AED
AED 
Follow this user-friendly guide for installing SSL on Nginx. Get your SSL certificate ready and use our easy instructions for SSL installation on NGINX web server.
Ensuring the safety of your Nginx web server is extremely important for protecting sensitive data. You can boost your site’s trustworthiness and ensure user data confidentiality through robust security measures.
SSL (Secure Socket Layer) protects your website by protecting the data exchanged between the browser and the server. It uses encryption to ensure the data is scrambled and unreadable for the cyber attackers.
Installing SSL certificates on Nginx will connect your website through a secured HTTPS channel. It ensures that the user information is safe and your website complies with key data regulations. This article will provide a comprehensive step-by-step process for installing an SSL certificate on the Nginx web server.
What are the Prerequisites for Installing SSL on NGINX?
All prerequisites must be ready before beginning the SSL setup for the Nginx Web Server. Proper planning is key to a smooth installation.
- The Nginx Web Server: It is important to verify that Nginx is installed on your server and configured correctly. Nginx is a popular choice for website hosting due to its effective management of HTTP and HTTPS traffic loads.System administrators use Nginx due to the efficient handling of network communication.
- SSL Certificate: Before attempting SSL installation on Nginx, ensuring a valid security certificate is paramount. Especially when protecting sensitive client information transmitted online, you must get a valid SSL certificate.To get an SSL certificate, you must submit a certificate signing request containing all the important details of your business. Once the certificate authority verifies it, a certificate will be issued.
- Server Access: Confirm that your web server has the proper access levels to update the Nginx configuration files safely and install the SSL certificate.
Steps for SSL installation on NGINX:
Here is a step-by-step process for installing SSL on Nginx:
Step 1: Obtain SSL Certificate
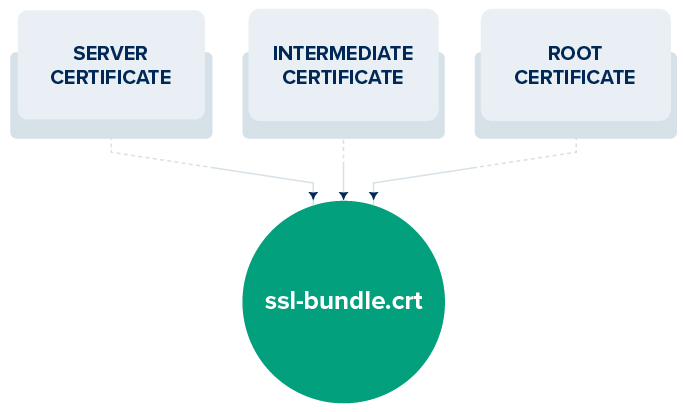
You will receive the required documents upon obtaining a SSL certificate through a bundle either emailed to you or through download from the official account. The bundle will have root, intermediate, and standard SSL certificates.
This is also known as the chain of trust, allowing the browsers to determine whether your server is secure. However, you must prepare your SSL certificate before installing it on the Nginx server.
Step 2: Prepare SSL Certificate Files
After acquiring the SSL certificate files, securely move them to your server using trusted file transfer protocols like SCP or SFTP. Be sure to place the SSL certificate files in a protected folder on your server.
Next, set the appropriate permissions that restrict access to a specific person only. Properly safeguarding certificate files helps ensure encrypted connections and private data are secure.
Typically, you’ll need to have the following SSL certificate files:
- SSL certificate file in .crt format
- Private key file in .key format
- Intermediate certificates to verify the identity of the website.
Once you have all the certificate files copy and paste their content in a text editor and save them in a new folder called ssl-bundle.crt.
You can also use a command line to merge the certificates into one file. This command will depend on whether you have separate intermediate files or if there is a single .ca-bundle file. So, if all the certificates are separately listed, use the command,
cat your_domain.crt intermediate.crt root.crt >> ssl-bundle.crt
And if all intermediate certificates are in one bundle, you can use,
cat your_domain.crt your_domain.ca-bundle >> ssl-bundle.crt
Step 3: Configure Nginx for SSL
It is necessary to set up a Nginx Web Server to utilize SSL encryption for securing your website. The initial step involves locating the specific Nginx configuration file for the site, typically found within the “/etc/nginx/sites-available/” or “/etc/nginx/conf.d/” folder. This particular file requires adjustments to enable SSL functionality.
One of the easiest ways to set up Nginx configuration is to copy the original server module into a new folder.
- Specify the server port to which it will listen “listen 443.”
- Ensure server block includes “ssl on”
- Define the filepath where you will save the SSL certificate “ssl_certificate /etc/ssl/ssl-bundle.crt;”
- Specify the directory on server where this certificate and its key will be saved “: /path/to/your_private.key;”
The entire Nginx configuration will look like the example below,
server {
listen 443;
ssl on;
ssl_certificate /etc/ssl/SSL-bundle.crt;
ssl_certificate_key /path/to/your_private.key;
root /path/to/webroot;
server_name your_domain.com;
}
access_log /var/log/nginx/nginx.vhost.access.log;
error_log /var/log/nginx/nginx.vhost.error.log;
location / {
root /var/www/;
root /home/www/public_html/your.domain.com/public/;
index index.html;
}
}
Step 4: Test Nginx Configuration
It is essential to check the syntax of your SSL installation on Nginx configuration file before restarting Nginx to make sure there are no mistakes. Use this command to examine the Nginx setup:
nginx -t
If the configuration test is successful without syntax errors, you can restart Nginx to apply the new configuration changes.
Step 5: Restart Nginx
Once you’ve verified the Nginx Web Server configuration, restart the Nginx web server to enable SSL support and apply the new SSL configuration settings. Use the following command to restart Nginx:
sudo systemctl restart nginx
Step 6: Verify SSL Installation
Following the restart of Nginx, the next step is validating the SSL setup and guaranteeing that your website can be accessed through HTTPS. Visit your website using HTTPS as the process (e.g., https://yourdomain.com) and look for the padlock symbol in the browser’s address bar, demonstrating a safe connection has been set up.
It is also possible to employ online SSL certificate-checking tools to confirm that the SSL installation and setup are appropriately configured. These verification methods can ensure that all components are arranged accurately.
Key takeaways:
Newer cyberattacks and threats require robust encryptions for your data. Using SSL certificates for your Nginx server ensures the website is secure against cyberattacks that may expose sensitive information. Follow these steps to make sure the installation process is efficient. It will also ensure that the SSL is working, and the website is secure.